
Sally Beauty Nail Tips provides a wide knowledge of choosing nail oil, gels, clippers, buffers, and care polishes.
However, today we’re going to learn the method of applying full coverage nails using builder gel and also give you some tips on how you can style and shape them to suit your desires.
Four (4) steps on the styling of Sally’s beauty nails and tips.
Preparing your natural nails.
Step 1
The first step is to push back your cuticles, so apply cuticle softener to each of your nails and begin rubbing it in.
Once it’s applied to both hands, allow it to sit for one minute before using a Beauty Creations cuticle pusher to gently push back your cuticle. If you don’t have a cuticle pusher, you can use the press-on nail to do this.
Step 2
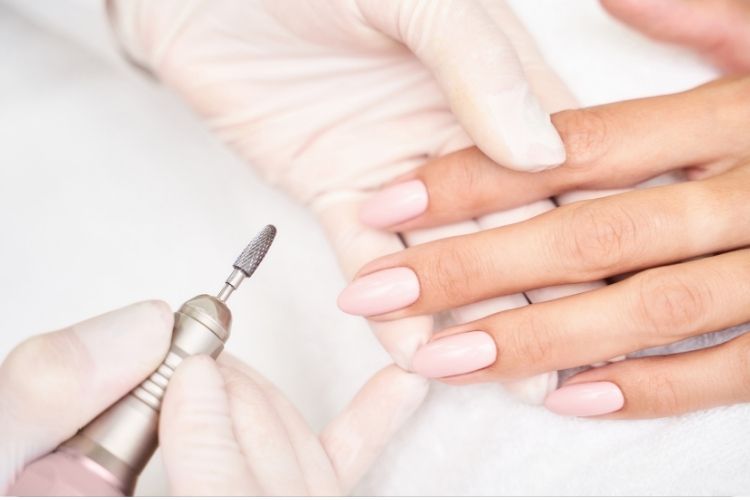
You’re now creating some texture on your natural nails, which will make it easier to push on and attach. You should not file your nails excessively; simply getting the entire surface perfect should suffice, and you should apply extremely light pressure.
Step 3
So, now that you’ve completed all of the nails, it appears that you’re ready to remove the dust. To do so, first use the ASP 2-in-1 dehydrator and cleansing wipe, then apply a small quantity of lint-free nail polish and wipe away any dust from your nails.
Step 4
Next, fill the inside of the press-on nail. This can be done using a standard nail file, but it is somehow difficult.
You’ll be using a file, so all you’ll have to do is lightly rub off the inside of the nail, being sure to cover all of the surfaces where your natural nail will touch.
This will help it adhere better, so check along the route to ensure that all of the pieces that will come into contact with your nail are there.
Size your nails.
Step 1
When using ASP long and full coverage nails to size your nails, make sure the tip fits from the left to the right side of the nail. It’s preferable if it’s a little big, but you’re aiming for the perfect fit, so keep trying until you find one that fits.
You will begin by filing down a small piece of the nail from the sides, and then gently shape the cuticle to make it more rounded so that it is not too large around the cuticle, while also shaping off cuticles that are more round than these nails.
Step 2
Next, use the nail file to buff in an upward manner. This will help to remove the superfluous nail and give it a nice finished edge, and you must do this on all nails that you file. If a nail does not fit properly, you must file it around the cuticle.
Still somewhat off-shape, so after checking the shape, be sure to check the shape of the nails occasionally so that you don’t overfill and see whether it fits before moving on to the next nail after all of your nails have been shaped and sized.
Apply your curing lamp tips.
Step 1
You will use the ASP USB LED curing lamp. This light is great because it has no back, making it easier to press on the nail while attaching it. First, you will apply the bonder to your natural nails. Coat the full surface of your nail and allow it to dry.
Step 2
Now, take your building gel and apply a thin layer to your nails. Stroke the brush against the rim of the bottle to remove any excess polish and create a thin coating.
Then, using a very light stroke on top of the nail, verify that you have covered the entire region. I prefer to do this by rotating my nails so you can see all sides.
Step 3
Next, we’ll cure it; you must do so, but you’ll use this LED lamp from the kit because you already have one.
Allow this to heal for 10 seconds, but do not let it cure any longer. After ten seconds, apply builder gel to the press-on nail.
You want to apply a nice thin layer to this, making sure to coat the entire surface that you buffed, and then you have to apply it to your nail at a 45-degree angle, pressing your natural nail in an upward direction as you press the nail down.
Step 4
Make sure you remove any excess gel polish before curing it, and you can hold the nail down with your finger next to it or another.
The simplest way to do it is to cut on the light after you’ve painted it on, then press the nail downward, press your natural nail upward, get rid of all the air, and then hold it, place it beneath the lamp for about 10 seconds.
Step 5
Next, you’ll shape your nails. This is where you go in and make sure everything is straight and the edges are nice.
After you have curved all of your nails, buff them. Using the same nail file, remove the shine surface off the nail, filing from side to side after covering the entire surface of the press-on nail.
Paint your nails.
Step 1
So you’ll apply the bonder to the press-on nail and let it air dry completely before applying the ASP base coat in a thin layer and curing it under the lamp for 30 seconds.
Step 2
After applying this light cream shade in a very thin layer, making sure to coat the entire nail, you’ll use a cup of nail polish remover and a brush to clean up around the edges with acetone.
But it would be safer, especially if it’s your first time using a non-acetone because you won’t be melting away your tips. So you’ve given all of the nails one layer, and you’re going to apply a second coat as well as cure it for 30 seconds.
Step 3
Now you’re going to make some really simple nail art with this center brush and blue crush from ASP.
Take a small bit of blue crush, set it on some aluminum foil, and begin painting wavy lines with the detail brush. There is no particular order or pattern; rather, it’s more like having fun with it. That is one of the nicest aspects of wavy lines.
You can essentially do whatever you want, so once you’ve finished the first layer, cure it for 30 seconds before retracing those lines for the second.
Step 4
Cure it again, then move on to a nice purple shade, creating wavy lines that intersect with the blue lines just to add touch.
Step 5
Finally, take the ASP. 2 in one dehydrator and cleansing wipe, apply it to a lint-free wipe, and use it to remove the sticky layer from the top of the nails.
Once you’ve wiped off your nails, apply a cuticle oil, such as Beauty Secrets cuticle oil, and gently rub it in.